[{"id":402084331755,"handle":"clamp-on-adjustable-gate-hinges","updated_at":"2026-06-10T06:06:03-05:00","published_at":"2022-06-21T12:14:48-05:00","sort_order":"best-selling","template_suffix":"","published_scope":"global","title":"Adjustable Gate Hinges","body_html":""},{"id":63794479151,"handle":"pipe-fence-accessories","title":"No-Weld Pipe Fence Accessories","updated_at":"2026-06-10T06:06:03-05:00","body_html":"When you work on a no-weld pipe fence, you’ll need to have the right pieces of equipment to cap off your fence posts. At Bullet Fence, we offer a wide array of no-weld pipe fence accessories, which includes our steel fence post caps. Caps are necessary for pipe fences to keep water and debris out Whether it's a press on post cap or a no-weld adjustable gate hanger, we have the right kinds of fence post toppers to complete your no-weld fence. Pick up your no-weld pipe fence accessories at Bullet Fence today and make your future fence building duties that much easier. ","published_at":"2019-08-27T11:56:08-05:00","sort_order":"best-selling","template_suffix":"","disjunctive":true,"rules":[{"column":"tag","relation":"equals","condition":"Post caps"},{"column":"tag","relation":"equals","condition":"gate hinge"},{"column":"tag","relation":"equals","condition":"Top Rail"},{"column":"tag","relation":"equals","condition":"Promo"},{"column":"tag","relation":"equals","condition":"Paint"},{"column":"tag","relation":"equals","condition":"Hardware"},{"column":"tag","relation":"equals","condition":"Postcap"}],"published_scope":"global"},{"id":30104092719,"handle":"all","updated_at":"2026-06-10T06:06:03-05:00","published_at":"2018-02-05T11:36:56-06:00","sort_order":"manual","template_suffix":"","published_scope":"global","title":"Shop All Bullet Fence System Collections","body_html":"\u003ch2 class=\"text-align-center\"\u003e\u003cspan style=\"color: #000000;\"\u003eWhether your plan to build fence braces or a rail fence, we have the right Fence Bullet for you. \u003c\/span\u003e\u003c\/h2\u003e\n\u003cp class=\"text-align-center\"\u003e\u003cspan style=\"font-weight: 400;\"\u003eBullet Fence Systems began when our founder, Ronald Goedecke, noticed a problem when he attempted a fencing project on his ranch. There was no convenient way to attach the cross members without the help of a welder. Not only is hiring a welder expensive and inconvenient but often times it’s not even possible, due to fire bans or the location of the fence. That’s where the Fence Bullet comes in. Designed to install and repair fencing without a welder, the Fence Bullet makes building fence braces or rail fences easy. Shop through all of our fencing products below. We are now offering minimum weld products. Top rail connectors can be slide over the top rail pipe and either be tack welded or attached with a teks screw. Watch us as we add products to this line. We fit and weld saving you time and money.\u003c\/span\u003e\u003c\/p\u003e"}]
["gate hinge"]
- | / Save up to % Save % Save up to Save Sale Sold out In stock
Select wood or steel applications for available post/rail sizes. See product pages for more information. Have a custom project? Let us give you a quote today.
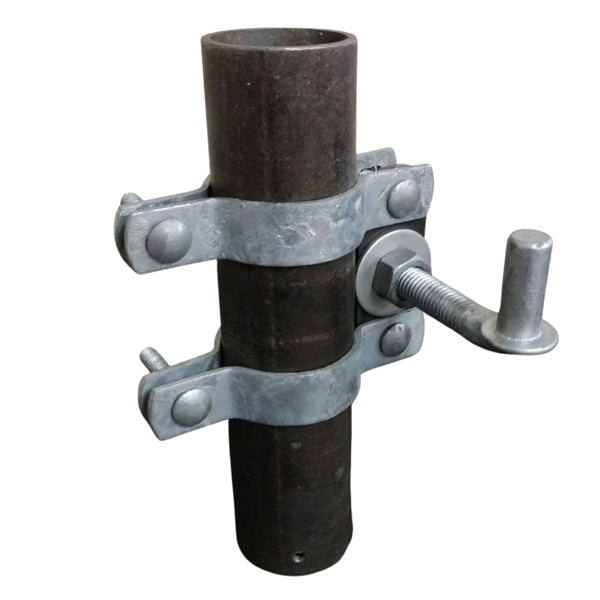
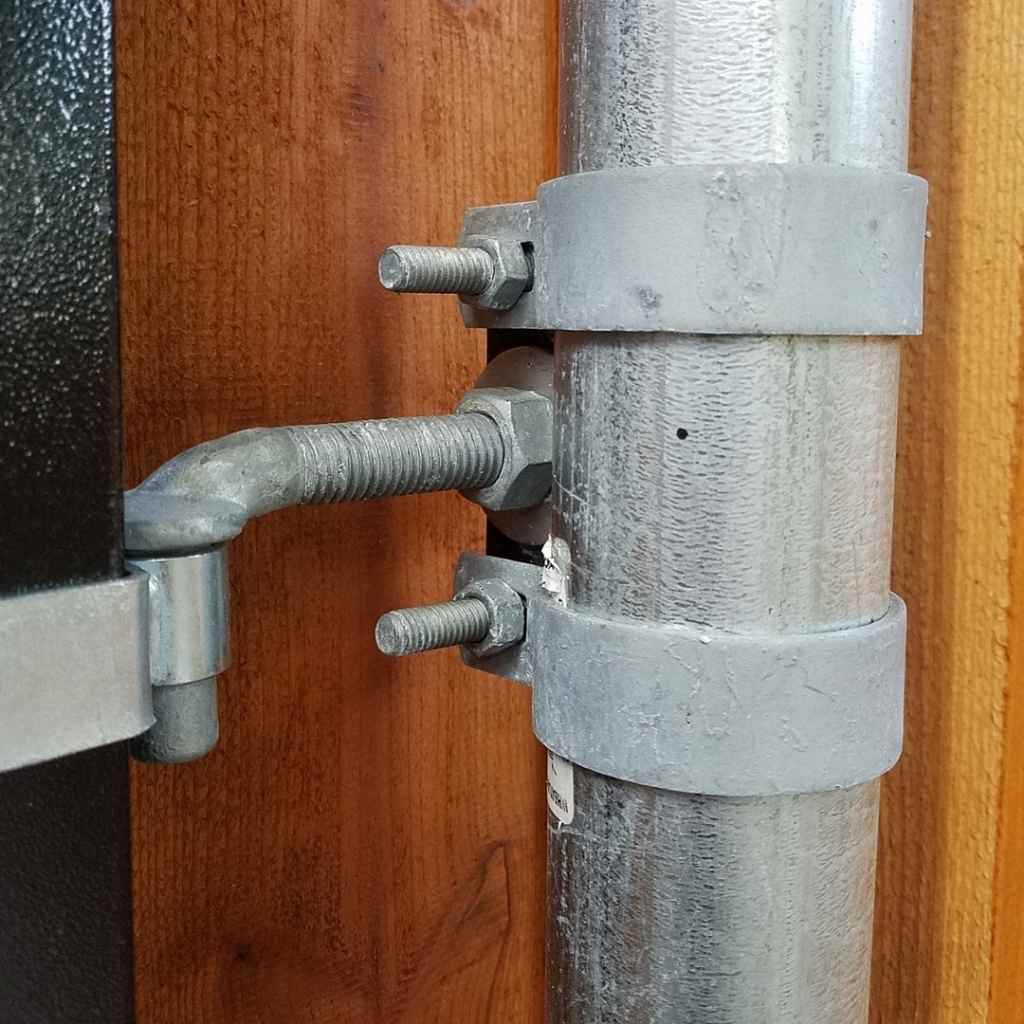
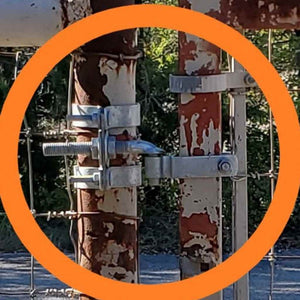
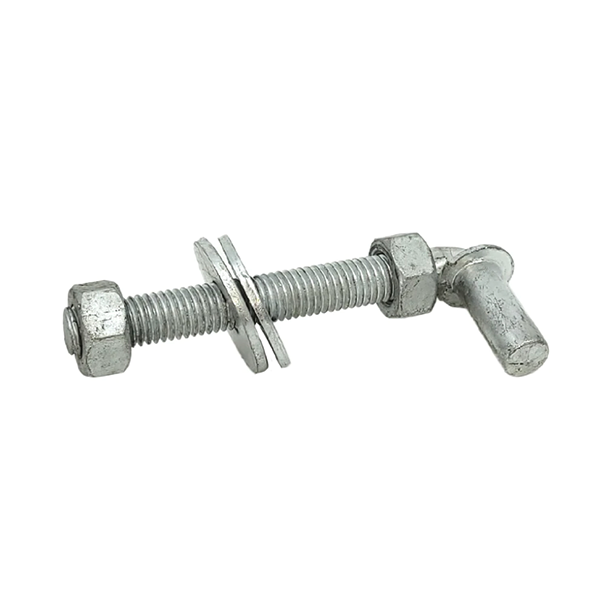
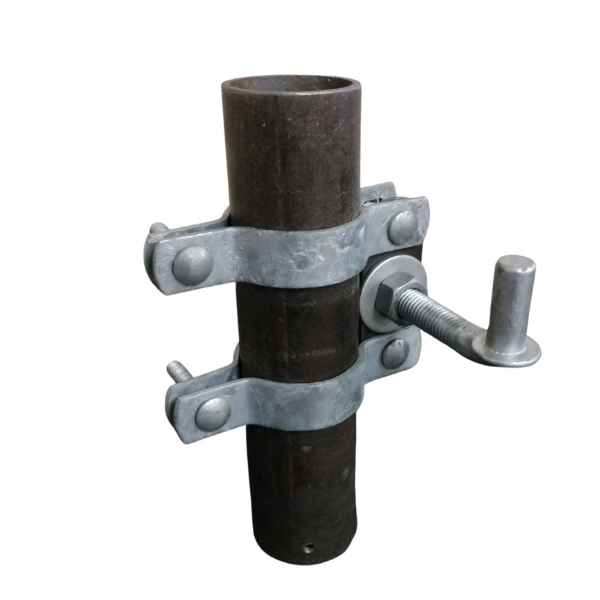
Clamp on adjustable gate hinge pair with J bolt add on option
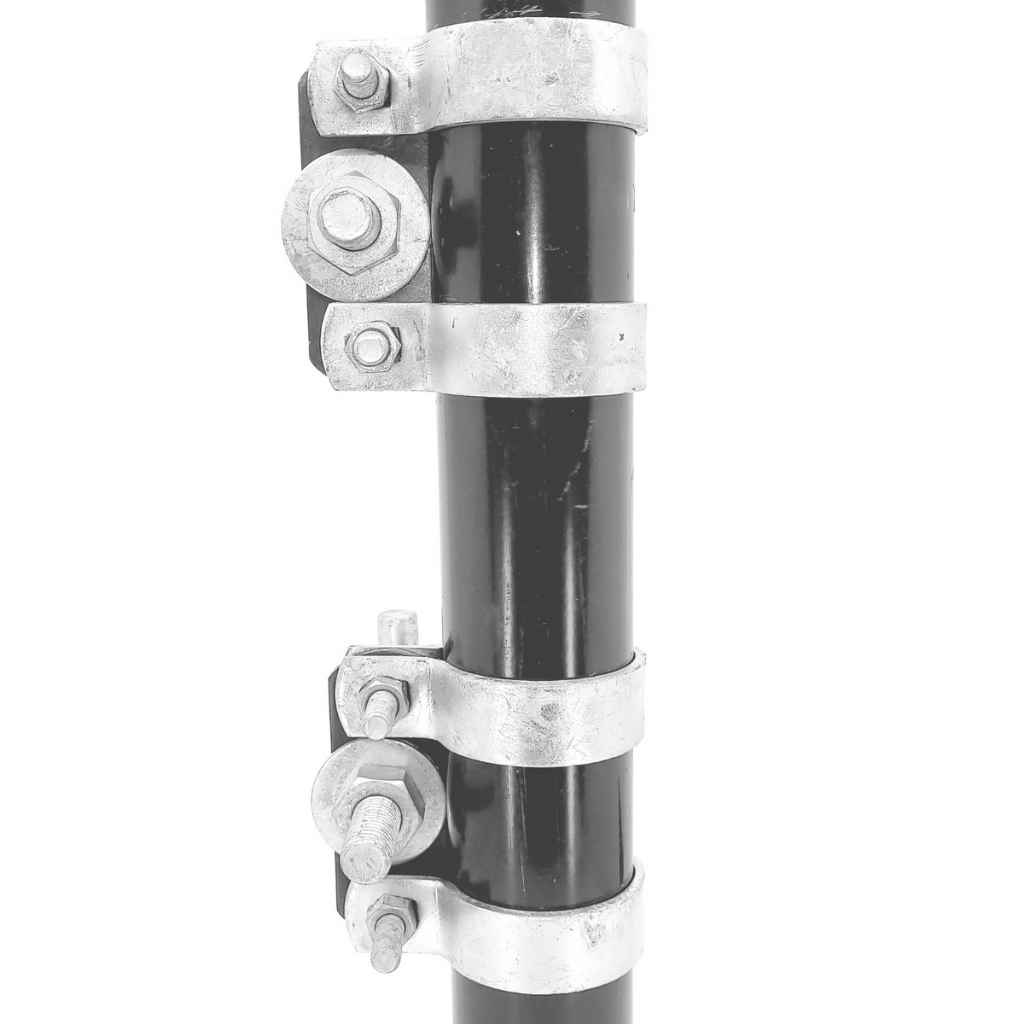
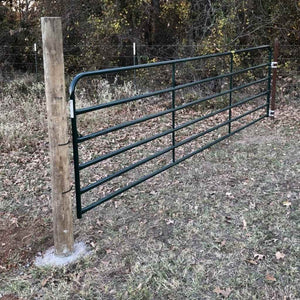
No welding and no holes to drill mean a fast and easy way to hang gates on pipe. These clamp on gate hangers (one pair, upper and lower assembly) let you mount an adjustable J bolt making gate hanging a snap. These farm gate hinges for pipe are fast and easy to install.
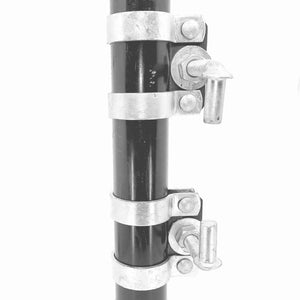
No need is the same, select the pipe gate hinges for your particular need. These are ideal for farm gate hinges for pipe fences. Option to order with or without j bolt and choose the band type. Order with one-way bands for a clean look for before wire install or two-way bands for installs after wire. Two-way bands are two halves and are easier to install on existing fences.
Pick your post size and order with or without threaded J bolts. Will accommodate either 5/8" or 3/4" diameter J bolts.
Gate clamp is not supplied (usually comes with the gate)
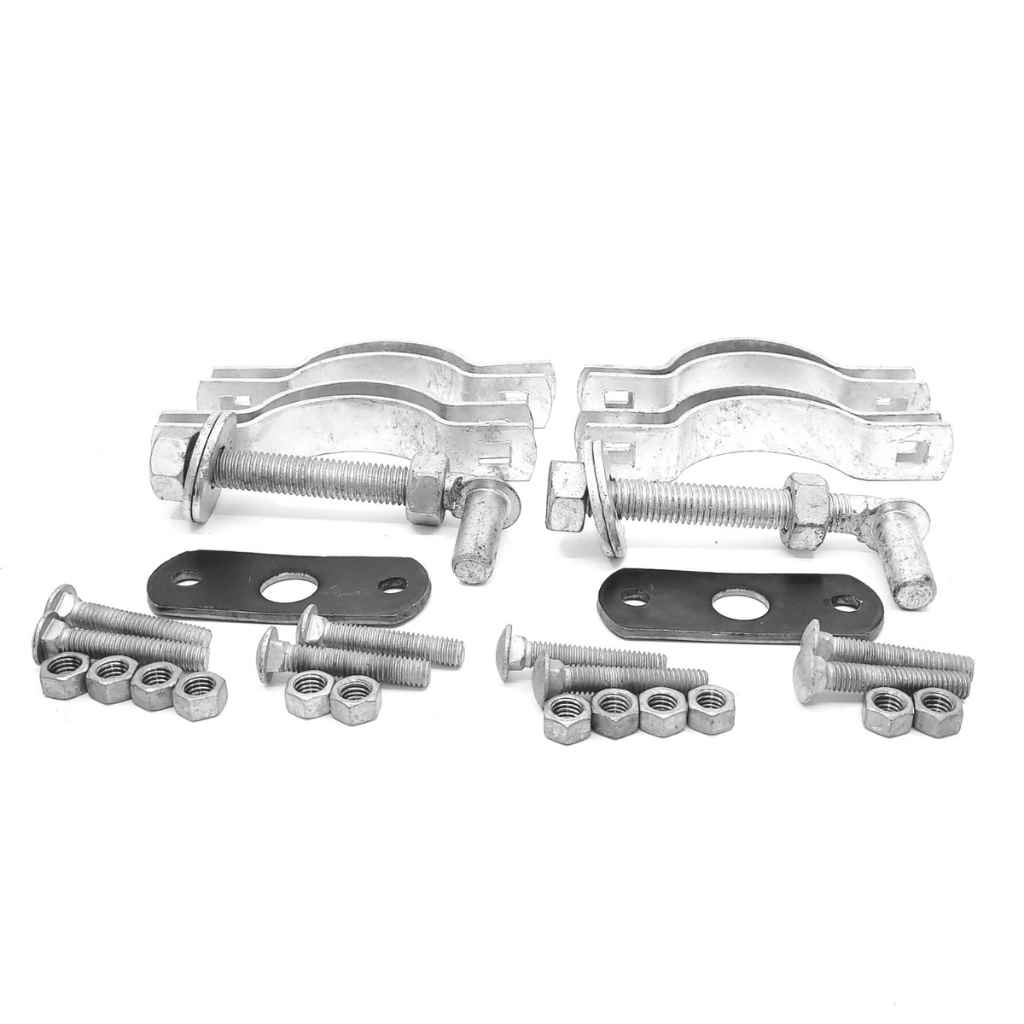
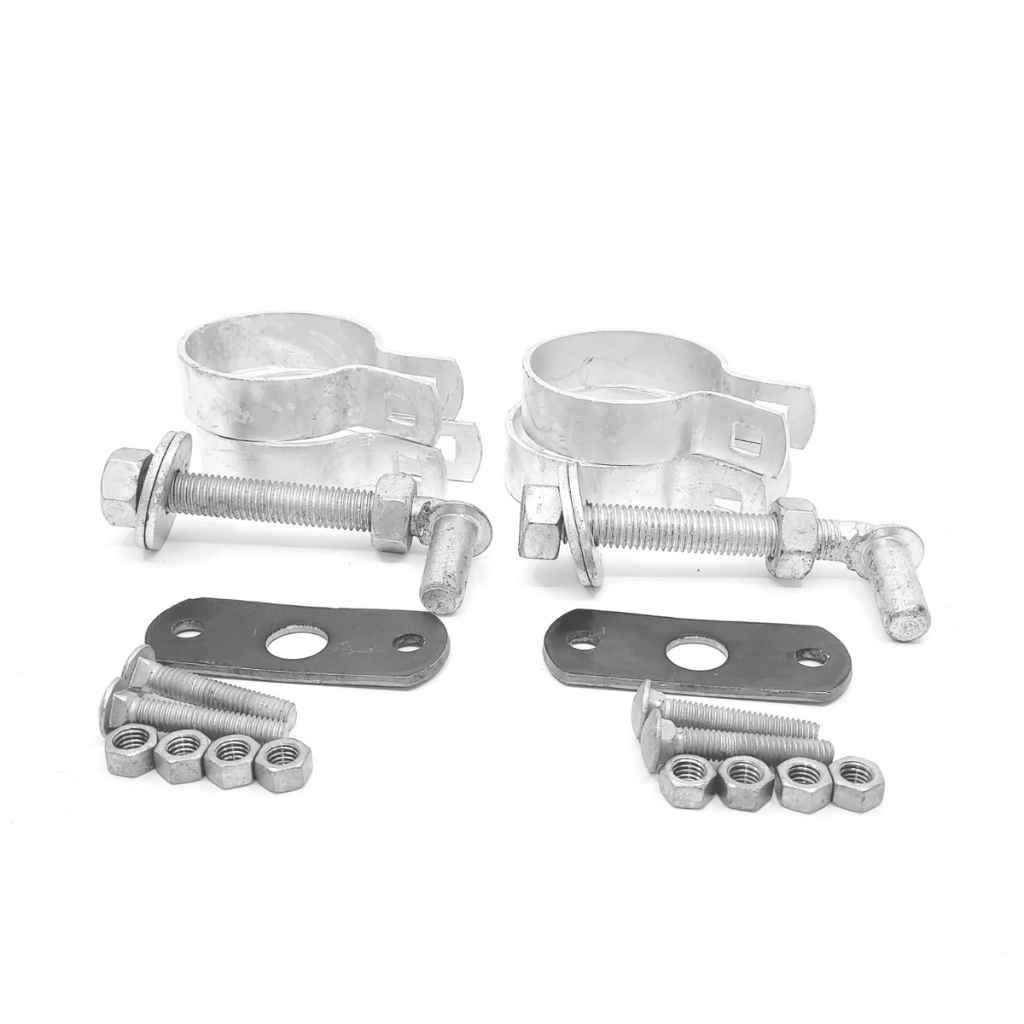
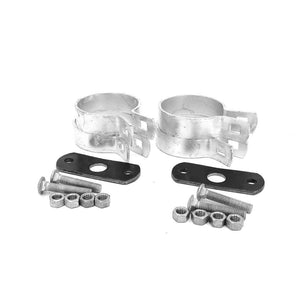
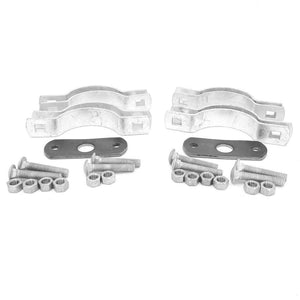
Kit components
What's included in a adjustable gate hinge kit?
All components are hot dipped galvanized for a lifetime of service.
One-way Kit includes:
4 one-way brace bands
4 carriage bolts
8 hex nuts
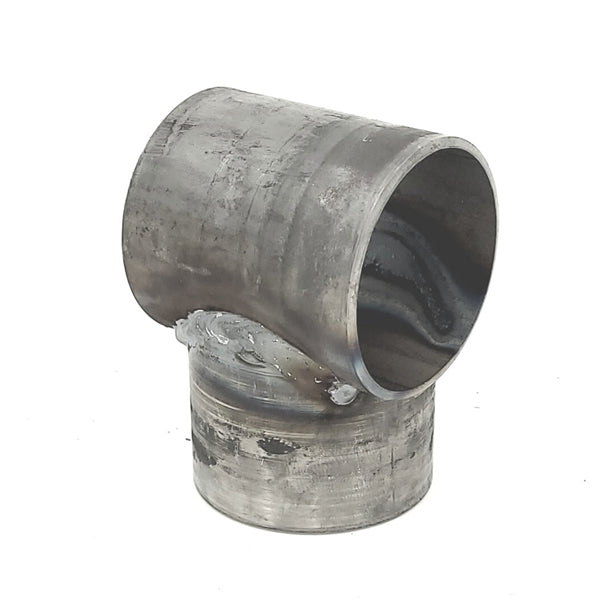
2 weld tabs
Kit also includes J bolt if J bolt option is selected
Two-way Kit includes:
4 two-way brace band pairs
4 carriage bolts
8 hex nuts
2 weld tabs
Kit also includes J bolt if J bolt option is selected
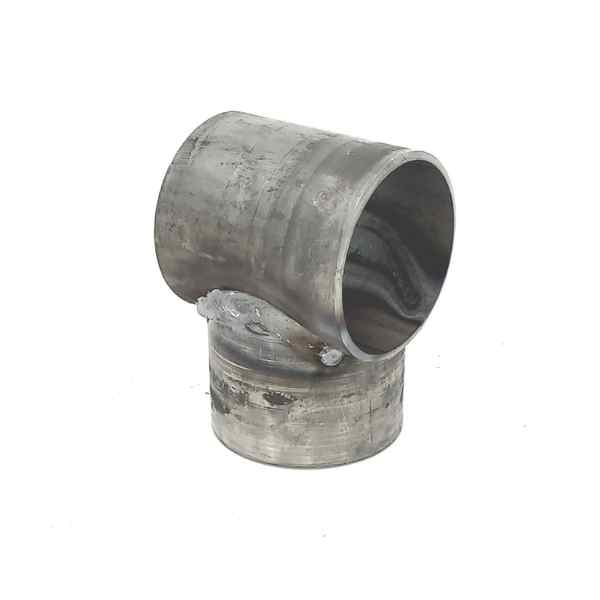
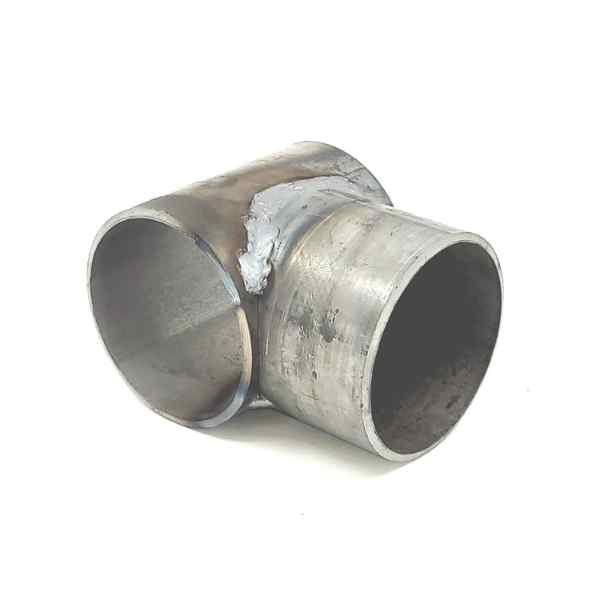
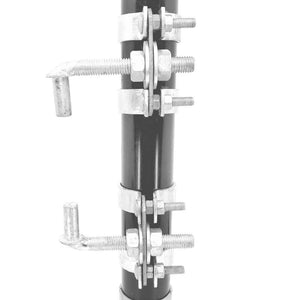
Only one hanger is show in picture, sold as pairs to hang one gate.
Installation
Measure and mark locations. With the gate clamped to the female gate hangers*, measure and mark locations for post j bolts allowing ground clearance for swing of gate.
Assemble brackets. Place carriage bolt end into one side of the band and through one end of the j-bolt plate. Thread on nut and tighten the plate to the band. Repeat the process for the other end of the plate. Repeat for other assembly.
If two-way bands are used place the assemblies on the post to the marked height with the center hole open on the preferred swing side. Place the other halves of the band on the carriage bolts and thread nuts on the carriage bolt.
If one-way bands are used slide brackets over the post to the height marked and with the center hole open to the gate direction on the preferred swing side. Thread nuts on the carriage bolt.
Tightenoutside nuts to clamp the bands to the post.
Install J-boltsthreading nuts on each bolt followed by a washer, insert the bolt into the plate hole, place another washer on the bolt followed by a nut. The nut should be threaded to allow some adjustment for gate leveling later. Make adjusts by threading j-bolt(s) in or out on the plate.
Place gate female clamp into bottom j-bolt assembly. J-bolts should be turned up on bottom, down on top. Loosen the top clamp and lift gate. Slide up clamp into the j-bolt and tighten.
Complete by securing clamps and making final adjustments to the gate swing.
*Not supplied with Bullet Fence System’s kit. Typically, provided with gate purchase.
You may also like
Overall rating: 4.8019323 / 5 from 207 reviews.
AI Generated Review Summary
Summary topics
Review topics: [].
Review highlights
Reviews
Hinge for a pole fence
"These worked perfectly. Sturdy and strong. The gate I hung on these hinges is an 8 ft span and is REALLY heavy. The hinges don’t budge! Really well made."
— Tom C. (5/5)
Gate hinge
"This gate hinge works great for mounting a metal gate to a drill pipe metal post. It’s adjustable do you can put the gate exactly how far from the post you want it."
— Paul E. (4/5)
Gate project
"I purchased the two way gate hinges after doing research on which style would meet my needs. The hinges worked great, I built heavy gates from 2 3/8 Oil pipe 77 x 48 each. . . the hinges support the gates well and I added gate wheels to offset weight of gates to put less stress on hinges."
— Roger M. (5/5)
Very handy
"First time I used one of these clamps and it was very helpful quick and easy to install"
— Allan W. (5/5)
This Company is absolutely the greatest
"Their product are really good. you could adjust it in everyay and their customer service is awesome."
— ERKAN R. (5/5)
Clamp-on gate hinge
"The kit was perfect for attaching an "Adjust-a-Gate" gate kit to a 2 3/8 steel post."
— Kyle S. (5/5)
Clamp on gate hinges
"They work great. Excellent product"
— Steven P. (5/5)
Great product. Save me a lot of time and money
"I'm very pleased with this product it saved me a lot of time and money"
— Bobby R. (5/5)
Solid Gate
"Very happy with my gate. The hinges are very user friendly and make a solid gate."
— Logan W. (5/5)
Awesome
"These parts are easy to use and I like the videos they have to help you along the way"


 from
$11.46 USD
from
$11.46 USD